Thursday, June 14, 2012

Two days and six hours later

I ran out of stripper last night and was only halfway done stripping the second window so I packed the works up because my hubby wasn't parking in the garage and that makes him cranky... so today I set up my work station in front of the car and I have sufficient room to move so he is happy as am I...

I am getting excited!! The window that is bowed out that needs the cames repaired... I soaked the hardware from the latch in stripper after removing it and worked on stripping the bottom edge cleanly without the hardware on... happy with the results thus far.
Is it me or does this look like copper??


another view.... I'm going to research this!

I bought a small brush set when I picked up another 500 mL container of stripper at Home Hardware, package said that the stainless steel brush was for removing paint... uh ya and wood!! Learned that one pretty quick, not too much damage done... there was a nylon brush as well and it is doing well at removing paint from the nooks and crannies. I did use the stainless brush though on these metal pieces and I think it did beautifully. If you look at the pictures below, you can see how, on window two, it is still on there pretty thick after about 3 rounds of stripping chemical. I've exposed the screws and cleared out the channel for the screwdriver so I will attempt removal tomorrow.

window 2 side 2 after 3 layers of stripper, still lots of layers of paint to go except on the bottom pane. That came off second go round...

look at the pretty colour underneath (ugh!)

Sorry again for the poor photo, camera not a fan of these windows or something!!! You can just barely see the screw heads exposed on the hardware. This is what the hardware above had looked like when I started working on the project after supper. Yay me!
So, I need to do some research... both for my own interest (is the hardware brass or copper) and if I can get the Workmate to work as a clamp so I can put the windows upright to do the one end piece that has black tarry paint on it without making such a mess. It's making me crazy!! It's lots of fun though. Well, best get to the laptop and get researching now! Later!

Tuesday, June 12, 2012

My latest project

Snow is gone, been working in the garden... preparing for the lazy hazy days of summer... NOT! More like "what do I want to do now?"

I found some old leaded bevel glass windows for sale on Kijiji and since I love the rainbows they throw off, I bought them!! They are old and beaten up, seen better days but I am confident that I can bring them back to their previous glory... here are the pictures of my 2 hours spent doing one side of a window this evening. Well worth it!! Once I have the other side stripped down, I will clean up the glass and take it in to have the lead caning repaired. Stay tuned for more progress reports!
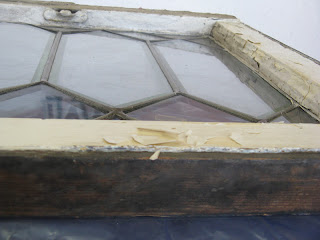
flaky old paint, layers and layers

paint on the glass too

Big ol' blob o' something on the bottom, sorry, camera would not focus!


you can see that the paint was cracking before I started

this is a shot of the glass that is popping out of it's canes

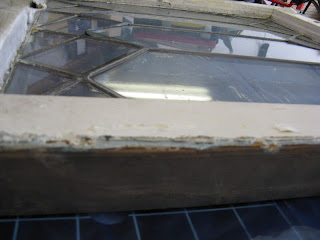
You could tell someone painted the windows shut at some point.


Stripper at work! Paint stripper people! Get your mind OUT of the gutter!

Me, illustrating "Safety First!"

After 2 hours, the better part of one side DONE!

My garage work station using my husbands underutilized Black & Decker Workmate <3
Products used: disposable paint brushes, scraper, small putty knife, paint stripper, safety glasses, floor covering (plastic recommended, I have a large old coroplast poster I used for this), nitrile gloves.

In the words of Porky Pig: "Be-de be-de be-de, That's all folks!!" Stay tuned for more elbow grease and tales of my adventures in to antique restoration.